Video Preview of a Tulip Flower
Signup Now
$10/month
![Secure payments by PayPal for a [VIDEO TUTORIAL] Chase from PAW Patrol - Fondant Cake Topper.](https://etdkdsjdmv5.exactdn.com/wp-content/uploads/2022/04/PayPal-1.png?strip=all)
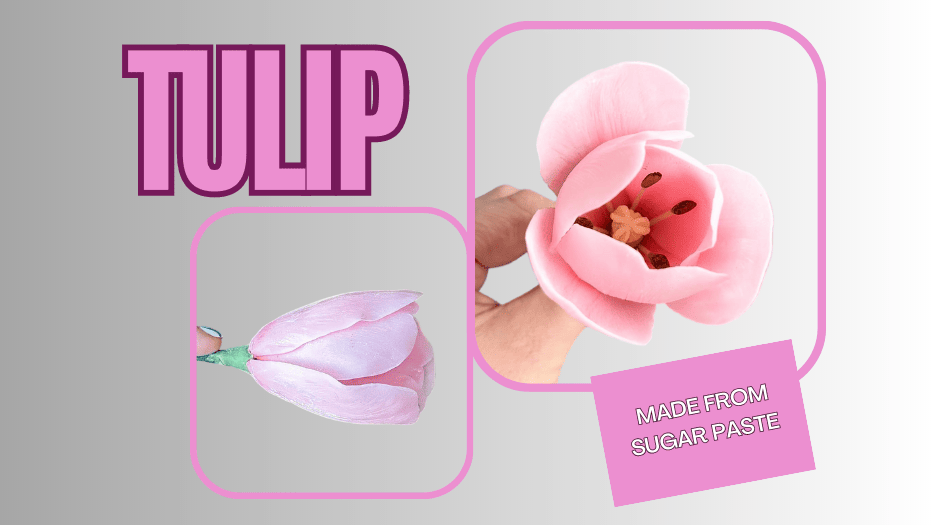
In this tutorial I will show you how to make a Tulip from sugar paste. It is available only to paid members.
If you are a member, please Login Here.
If you want to become a member, please Signup Now.
If you subscribe, you will be able to see how to make a Tulip from start to finish. Each tutorial is showing each detailed step of the process. You’ll get instant access to all available lessons + any future ones I do each week.
How To Make A Tulip From Sugar Paste
Have you ever wanted to learn how to make a beautiful and intricate tulip out of sugar paste? It can be an intimidating task, but with the right technique and practice, it’s not as hard as it looks! Not only will your guests be amazed at your incredible decorating skills, but they’ll also love the delicate flavor that comes from using sugar paste. In this article, I’ll teach you step-by-step how to create a stunning edible flower in the comfort of your own home. So grab your supplies and let’s get started! The first step is gathering all the necessary ingredients for making your sugar paste tulip. Now that you’ve prepped the material for creating your masterpiece, read on for detailed instructions on how to make a gorgeous three dimensional tulip from sugar paste!Rolling Out The Paste
To begin, you’ll need a few materials: sugar paste in the color of your choice, powdered food coloring to tint it if desired, a rolling pin and an offset spatula. Start by kneading the sugar paste until it’s pliable and smooth. Next, roll out the dough on a work surface dusted with cornstarch or icing sugar, making sure that it’s as even as possible. If you’d like to add some color, now is the time; just sprinkle a bit of powder over the top and knead gently again until evenly distributed. Once you have your piece of sugar paste ready at the desired thickness (about 1/4 inch thick), use a sharp knife or cookie cutter to cut out petal shapes for your tulip. Finally, let them dry slightly before carefully transferring them onto parchment paper.Creating Petals
Now that the sugar paste is rolled out, it’s time to create the petals of the tulip. To do this, grab a flower petal cutter and press into your sheet of pasted fondant until you have cut 12 petals. Place these aside on wax paper so they don’t stick together while we work on the next step: forming our tulip. * Take two or three of your petals and roll them slightly between your fingers for added texture. * Then, using some water, dampen one side of each petal before overlapping them at their edges to form a cone shape. * The innermost section should look like an upside-down ice cream cone with ruffled edges. * Pinch the top pointy end of your cone to make sure all layers are secure in place. * Now use small amounts of edible glue to fix those layers together if needed. Once you have made several cones from different numbers of petals (3, 4, 5), you can begin assembling your tulip! Arrange and overlap each cone layer by layer downwards onto a piece of parchment paper gently shaping as you go along until desired size has been reached. If desired, add extra detailing such as veining lines or stamens created from small pieces of wire covered with white royal icing. With this, you have now constructed your very own beautiful sugarpaste tulip!Shaping The Petals
First, roll out the sugar paste until it’s about 1/8th of an inch thick. Cut five petal shapes from the rolled out paste with a knife or cookie cutter. Next, take each individual petal and shape them by flattening their edges to give them a more natural look. Make sure all the petals have equal width at both ends. This will create uniformity in your flower when it’s assembled later on. To add texture to the petals you can use veining tools and lightly press into the surface of each one. You can also make indentations around the edges using either a ball tool or something similar. Once you are happy with how they look, set aside for now while we move onto creating the center of the tulip.Attaching The Petals To The Tulip Center
Having shaped the petals, it’s time to attach them to the tulip center. To do this, gather all eight petals and place them around the top of a small ball made from sugar paste. Make sure that each one is evenly spaced apart in order to create a realistic-looking flower shape. Next, take an edible glue or water and lightly moisten each of the petals at their base so they will stick together when placed on the ball. Carefully press down each petal onto the ball, making sure not to tear any of them as you go along. Finally, check that all of the petals are securely attached and have formed a nice tulip shape before moving on to adding finishing touches such as leaves or stems.Assembling The Separate Parts Of The Tulip
Now that you have the separate parts of your sugar paste tulip ready, it’s time to assemble them. Start by taking two petal shapes and lightly pressing them together at their tips. Once they are connected in this way, begin gently pinching up along the edges of both petals until they meet each other firmly in the center. Do the same with the remaining four petal pieces, connecting them all at their tips into a flower shape. The next step is to use some royal icing or edible glue to secure the joined petals together even more firmly. Place a small amount of glue on one side of the joint and press down onto its opposite side for a few seconds until it sticks securely. Repeat this process for all sides where two petals join together. Your last task is to place a dot of adhesive in the middle of your finished flower and stick on a stamen or yellow ball made from fondant or gum paste material. And just like that, your beautiful sugar paste tulip is complete!Creating Leaves For Your Tulip
To create the leaves of your tulip, you’ll need to roll out some green-colored sugar paste. Cut two ovals that are slightly curved on one end and narrow at the other. Take each piece and pinch the ends together so they look like a teardrop shape. Now use scissors or an X-acto knife to cut wavy lines into each leaf to give them texture. Place these leaves around the stem of your tulip, making sure their curves follow the same direction as those of the petals. Make sure you tuck them underneath a bit so they stay in place when you pick up your flower. Once done, it’s time for final touches! You can add detail such as veins in the leaves using edible food markers or dust with powdered food color if desired. Your beautiful sugar paste tulip is now ready to be displayed!Making A Stem For Your Tulip
Making the stem for your tulip is an important part of completing the overall look. Here’s what you’ll need: * Sugar paste and food coloring: * White sugar paste, to make the stem itself * Green food coloring, to tint the white sugar paste green * Rolling pin or other tool to roll out and shape your stem * Skewer stick or other support material (optional) To begin, knead together a small amount of white sugar paste with some drops of green food coloring until it has turned a light shade of green. Once this is done, roll out the colored sugar paste using a rolling pin into a thin cylinder shape that resembles a real flower stem. You may also want to insert either a skewer stick or another type of supportive material inside before shaping so that it holds its form better. Finally, twist the top end slightly in order to create more realistic curves on top. When finished, let the stems dry overnight before attaching them to your tulips. This will ensure that they stay in place and don’t lose their shape during assembly. With these steps complete, your tulips are now ready for decoration!Adding Colors And Textures To Your Sugarpaste Tulip
Once you’ve made your sugarpaste tulip, it’s time to add some life-like textures and colors. You can use simple food coloring for the petals of your flower, but if you want a more realistic look then using powdered colorants is the way to go. Mix in a small amount of powder with water until it forms a paste, then apply to each individual petal as desired. For added depth and texture, sprinkle on tiny pieces of edible glitter or sparkles. The stem of the tulip can be colored with green food coloring or even painted with an edible paintbrush. To make the stem look fuller, wrap a piece of yellowish-green crepe paper around it before attaching it to the base of the flower. This will give your tulip a nice full effect that looks natural. Finally, don’t forget to top off your masterpiece by adding leaves! Leaves are easy to make out of paper or fondant and they add just enough extra detail that makes all the difference in how real your tulip looks.Finishing Touches To Make It Look Realistic
Now that you have your sugarpaste tulip shaped and colored, it’s time to add the finishing touches. To give your flower a realistic look, you’ll need some additional materials. You can find these at any craft store or online. First, purchase some edible glitter for a sparkling effect on the petals of your tulip. Sprinkle lightly around each petal and use a paintbrush to smooth it out evenly. To make the center of the flower appear more three-dimensional, insert an edible pearl in the middle of your tulip. This will also give it a beautiful natural sparkle. Finally, place your finished creation onto a cake or cupcake for decoration! Your guests are sure to be impressed by this amazing work of art!Drying And Setting For Storage
Once your tulip is made, it’s time to dry and set it for storage. The best way to do this is by letting the flower sit at room temperature without direct sunlight or other sources of heat. This will allow the sugar paste to firm up while preventing any discoloration. It should take around 12 hours for a complete cure. When you’re sure that the tulip has dried completely, wrap it in parchment paper before putting it away in an airtight container. This prevents moisture from building up inside the box, which could cause mold growth on your masterpiece! If stored properly, a sugar paste tulip can last several months with no deterioration. To keep your creation looking its best over time, try not to move or handle it too much. And if ever needed, you can use royal icing to repair small cracks or broken pieces. With care and attention, you’ll be able to enjoy your beautiful tulip for many years to come!Different Techniques To Create A Variety Of Effects With Sugar Paste
Once you have the basic tulip shape, there are a variety of techniques to create different effects with sugar paste. You can use various tools such as rolling pins and pastry cutters to achieve desired results. For example, using a pointed tool like an embossing stylus or sharp knife, you can make marks on the petal surfaces to create texture. If you prefer something more subtle, add just a hint of color by lightly brushing over the surface with edible dusts or food coloring gel. To give your tulips dimensionality, try cutting out shapes from colored sugar paste and adding them onto the base layer. This technique allows for extra detail that would otherwise be difficult to accomplish with one piece of sugar paste alone. It also provides an opportunity to combine colors together in order to give your creation a unique look and feel. Additionally, tiny pieces of silver leaf can be used to accentuate certain areas for added sparkle and shine. With the right combination of these techniques, it’s easy to customize your own beautiful tulip creations that stand out from any store-bought flower decorations!Creative Ideas To Use Sugar Paste Tulips
Creating a tulip from sugar paste is a great way to show off your decorating talents. It requires the same techniques as any other flower, but with more attention to detail in order to create an authentic look. Here are some creative ideas for using sugar paste tulips that will make your creations stand out: * Use them to top cupcakes and cakes for extra visual interest. * Make small clusters of flowers to adorn gift boxes or bags. * Create larger bouquets of sugar paste tulips and use them as table centerpieces or decorations at weddings or events. * Incorporate them into cake pops by attaching the stem while they dry – this adds a unique twist! Making sugar paste tulips can be tricky, but it’s worth the effort when you see how beautiful they turn out. With practice and patience, your designs can look almost too good to eat! Plus, having these ideas on hand makes creating something special even easier.Frequently Asked Questions
What Tools Are Needed To Make A Sugar Paste Tulip?
Creating a sugar paste tulip requires the right tools and techniques. Before getting started, it’s important to make sure you have everything you need on hand. This guide will list the necessary materials and explain how to use them correctly. First, you’ll need some edible sugar paste in your desired color or colors. You can find this at any craft store or online shop that specializes in baking supplies. Additionally, you’ll want to get a few different types of cake decorating tips as well as an icing bag for applying the paste onto your flower petals. Finally, you may also want to purchase some modeling tools such as small tweezers and metal cutters for shaping and detailing the petals of your tulip. Once all of these items are gathered together, then it’s time to start making your sugar paste tulip! Begin by rolling out a thin sheet of sugar paste with a rolling pin and using a cutter or knife to create two half-circle shapes for the outer petals of the flower and four smaller circles for the inner petals. Use tweezers (or even just fingers!) to shape each petal into its desired form before attaching them one by one around a central stem made from either rolled up sugar paste or real green florist wire. To add definition, use various cake decorating tips along with an icing bag filled with colored frosting to accentuate details like veins and edges within the petals. Once finished, allow your creation plenty of time to harden properly so it doesn’t collapse when touched or moved. With practice and patience, soon enough everyone will be admiring beautiful sugarpaste tulips crafted by you!Is Sugar Paste Edible?
Sugar paste is a popular material for making edible decorations, such as flowers and sculptures. But is it actually safe to eat? In this section, we will take a look at whether sugar paste is edible or not. To answer the question of if sugar paste is edible: yes, generally speaking, it is. Here are some key points to remember when using sugar paste in food preparation: 1. Sugar paste must only be used on foods that do not need additional cooking or baking after decoration. 2. Never use non-edible colors or additives when preparing with sugar paste. 3. Make sure you store your sugar paste properly; it should be kept away from heat sources and wrapped airtight in plastic wrap so it does not dry out. 4. Always check the ingredients list before buying commercial sugar pastes, as some may contain non-edible elements like preservatives or waxes which can make them unsafe for consumption. If you follow these basic rules, then yes – you can enjoy eating items made with sugar paste! It’s important to note however that although most varieties are safe to consume, they don’t taste particularly great due to their high concentration of sugars and gums – so keep that in mind when deciding how much to add into recipes!What Kind Of Sugar Paste Should I Use?
When it comes to making a tulip from sugar paste, the type of sugar paste you use is an important consideration. Sugar paste, also known as rolled fondant or ready-to-roll icing, is a sweet dough that can be used to cover cakes and create decorations for desserts. It’s edible and comes in several colors, so choosing the right one for your project is key. There are two main types of sugar paste: non-cooked and cooked versions. Non-cooked sugars pastes are easier to work with because they don’t require any additional preparation – just roll out the dough and cut it into shapes. Cooked versions tend to have a better taste but require time to prepare first – usually boiling water with butter or shortening. Depending on what kind of tulip design you’re looking for, either type might work well. No matter which version you choose, make sure it has enough elasticity to hold its shape when molded into a flower or other decoration. You’ll need something that won’t crack too easily while still being soft enough to manipulate easily by hand or with tools like cookie cutters and rolling pins. With the right type of sugar paste selected, you’ll have everything you need to craft beautiful tulips from this versatile material.Are There Any Safety Precautions I Should Take When Working With Sugar Paste?
When working with sugar paste, it’s important to take a few precautions. There are several safety measures that should be taken when using this type of material. First and foremost, wear protective clothing such as gloves, goggles and a dust mask if you’re able to obtain one. Sugar paste can irritate your skin and eyes, so having the right attire is essential. It’s also helpful to have an area that has plenty of ventilation because sugar paste particles can escape into the air easily. Second, remember to keep all tools used for handling sugar paste away from children or pets due to potential hazards involved in contact with them. Tools such as knives and small cutters could cause harm if misused by those inexperienced in their use. Additionally, make sure any equipment is kept clean since bacteria or other contaminants can spread quickly on sugary substances. Finally, always read labels carefully before purchasing anything related to sugar paste work. Make sure the product is safe for consumption and free of toxins like lead or sulfur dioxide that may be harmful if inhaled or ingested. Also check expiration dates closely; out-of-date ingredients won’t yield quality results! By taking these simple steps while crafting with sugar paste, users will be better prepared for success without sacrificing safety along the way!How Long Does It Take For Sugar Paste To Dry?
When working with sugar paste, one of the most important aspects to consider is how long it takes for the material to dry. It’s possible that if you don’t plan accordingly, your project could end up ruined. So what exactly is the drying time for sugar paste? It depends largely on factors like humidity and temperature in the environment, as well as the thickness or thinness of the layer applied. Generally speaking, a thicker coating will take longer to dry than a thinner one; however, even then it should be ready within 24 hours at room temperature. In drier climates or when using an oven with lower temperatures (between 90-100 degrees Fahrenheit), this process can be accelerated but must still remain closely monitored so as not to cause any damage. On the other hand, there are some precautions that need to be taken into account when working with sugar paste too quickly. This includes avoiding direct sunlight and heat sources such as stovetops and microwaves. Additionally, allowing proper air circulation by opening windows and doors can help prevent sticking and dampening of materials due to high moisture levels from steamy showers or boiling pots of water in kitchen areas nearby. Finally, always use protective gloves while handling sugar paste since prolonged contact with skin may lead to irritation or allergic reactions. In short, getting familiarized with how long does sugar paste take to dry is key for successful projects. Different variables can affect its drying process: from climate conditions to managing exposure times properly – all these elements should be taken into consideration before starting a new project involving sugar paste.Can I Use the Same Technique to Make a Tulip From Sugar Paste as I Would to Make a Freesia?
Yes, you can use the same technique to make a tulip from sugar paste as you would to make a freesia. Simply watch how to create freesia fondant and apply the same principles to craft a beautiful sugar paste tulip. Mastering one flower will make it easier to create others with the same method.