Signup Now


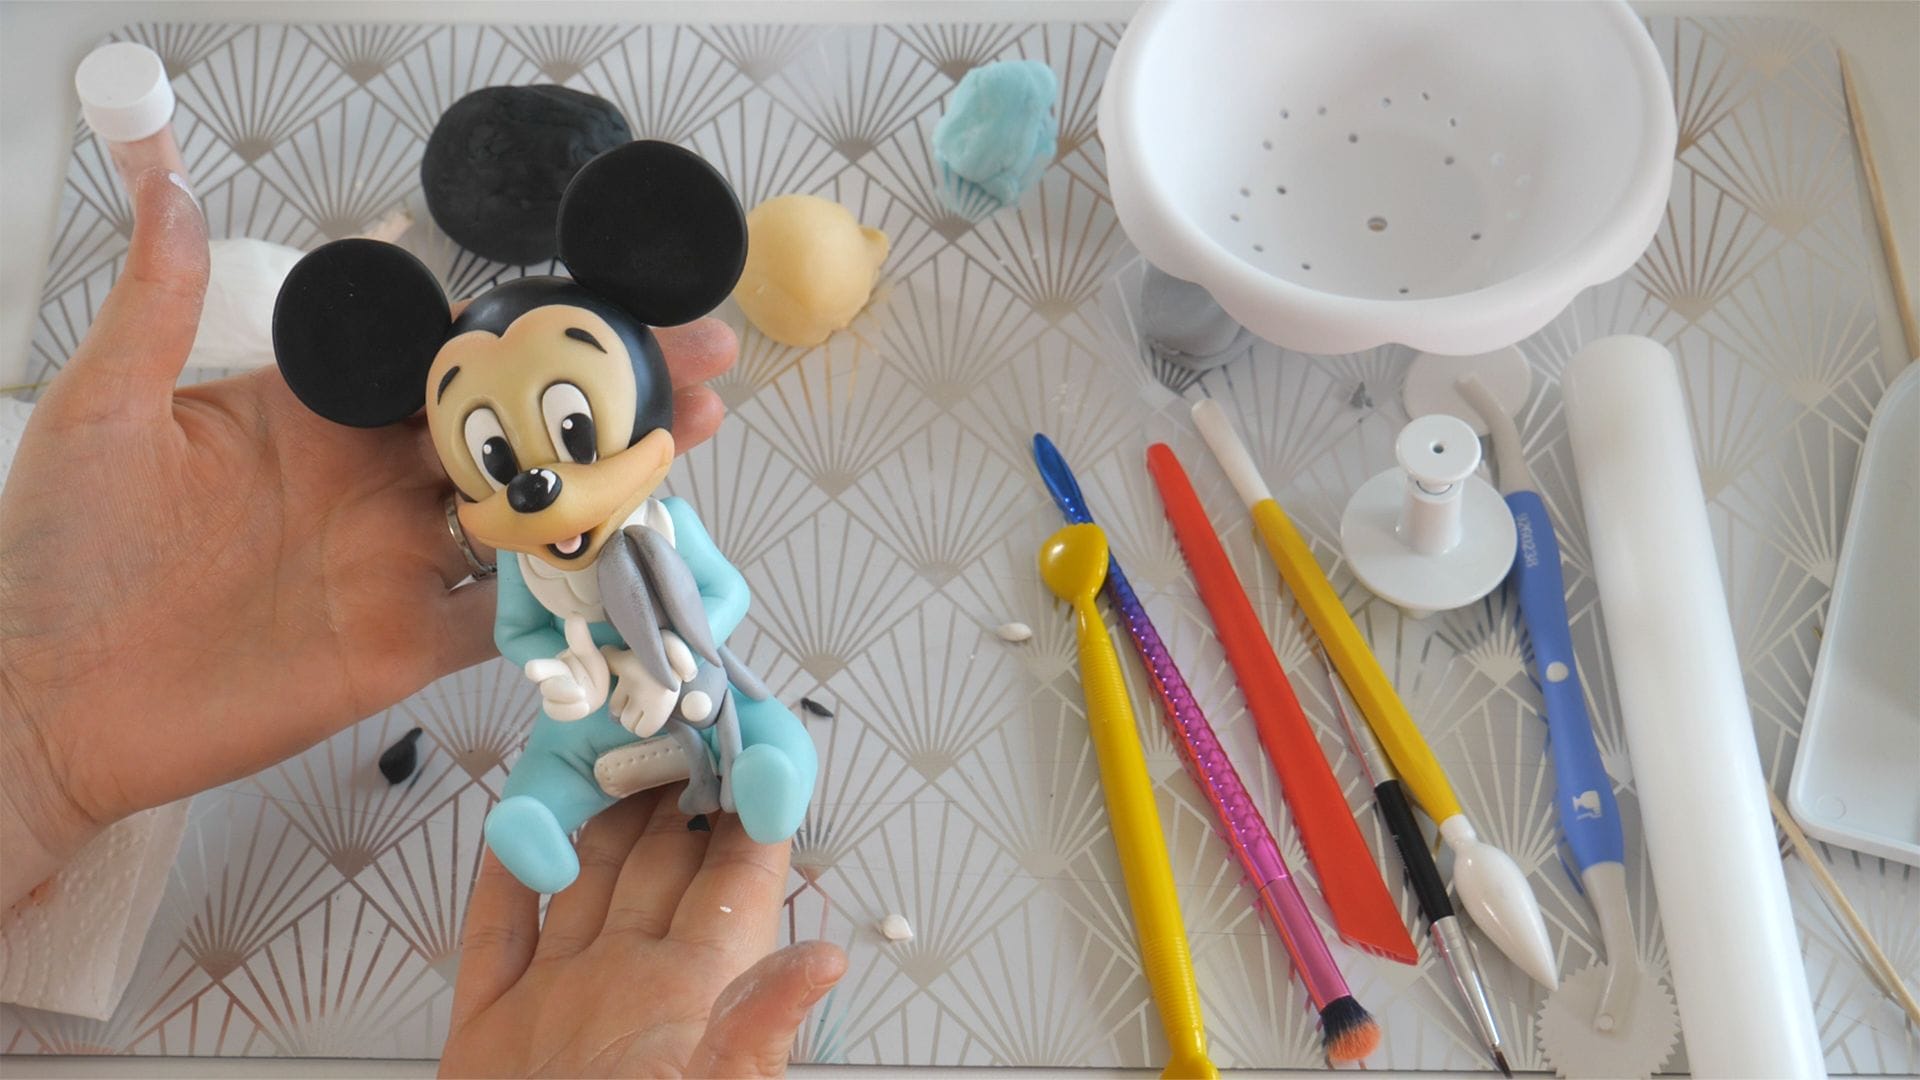
In this tutorial I will show you how to make Baby Mickey Mouse from fondant. It is available only to paid members.
If you are a member, please Login Here.
If you want to become a member, please Signup Now.
If you subscribe, you will be able to see how to make Baby Mickey Mouse cake topper from start to finish. Each tutorial is about 1-2 hours long, showing each detailed step of the process.
Can I Use the Techniques from the Sunny Mouse Fondant Cake Topper Tutorial to Make a Baby Mickey Mouse Cake Topper?
Yes, the techniques from the sunny mouse cake topper tutorial can be easily adapted to make a baby Mickey Mouse cake topper. With a few adjustments, such as using pastel colors and a smaller size, you can create an adorable baby version of Mickey for your cake.
Below you can see the steps we follow in this tutorial
Step 1 – Torso and legs

Step 2 – Arms and toy

Step 3 – Head and ears

Step 4 – Finish